Translate

Sunday, September 29, 2013

Rat Tail Radishes!!! What did you say???

Rat Tail Radishes!!! What did you say???

For people that don't know me that well...I have been growing a good amount of veggies in my backyard for the last 3 years and I can't explain the huge satisfaction to grown your own food and supply my family with the freshest ingredients you can get.
here is a photo of the garden and Willy Nelson our dog which loves gardening and prefers tomatoes over bacon.

So going back to this intriguing vegetable rat tail radishes that I want to tell you about. This year was the first time we grew in our garden. I found it on www.rareseeds.com they have the best variety of heirloom seeds you can find. Where I learned that rat tail radishes is an amazing edible-podded radish, a variety that produces loads of tender, large seed pods that add a delicious flavor to salads and stir-fries, also superb pickled. It's an old Asian heirloom that was grown in US gardens in the 1860s.And they are so easy to grow, very hardy and one single plant yields a great amount of edible pods and it's also very ornamental too!


So pretty much it's a radish looks like a greenbean but taste like a spicy radish.Rat tail radishes are filled with great nutrition too, rich in ascorbic acid, folic acid, and potassium. They are a good source of vitamin B6, riboflavin, magnesium, copper, and calcium.
So I know you are asking “What do I do with Radish Pods?”    Here’s a few ideas:
  • Eat them raw –  they are great with your favorite chip dip or hummus
  • Chop them and put into salads
  • Puree them to make a sandwich spread. Just threw them into a Vitamix or food processor with some mayo, apple cider vinegar and salt. It would make a great veggie chip dip too
  • Add to an Asian Stir Fry with ginger and garlic
  • Chopped them and add to couscous like you would do with scalions
  • Make a quick pickle with them it makes a great snack!
  • Pick the pretty flowers and add them to your salad. Yes! They are edible too
So next time you are looking for something different to grow try experimenting with rat tail radishes!
Enjoy
Pri


 Rabanetes Rabo de Rato! O que você disse ? ?

Para as pessoas que não me conhecem muito bem ... venho plantando de uma boa quantidade de legumes,e vegetais no meu quintal nos últimos 3 anos e eu não posso explicar a enorme satisfação para crescer seu próprio alimento e fornecer a minha família com o ingredientes mais frescos você pode encontrar.
Aqui está fotos da horta e Willy Nelson nosso cão que adora jardinagem e prefere tomates sobre bacon.


Então, voltando a este interessante vegetal rabanetes rabo de rato.Este ano foi a primeira vez que plantei na nossa horta . Eu encontrei-o em www.rareseeds.com eles têm a melhor variedade de sementes que você pode encontrar. Onde eu aprendi que rabanetes rabo de rato é um rabanete incrível, uma variedade que parece com grandes vagens que dão um sabor delicioso para saladas e frituras , também excelentes em conserva. É uma velha herança asiática que foi cultivado em jardins dos EUA no 1860s.E são tão fáceis de crescer, muito resistente e uma únicapalnta produz uma grande quantidade de vagens/ rabanetes comestíveis e também é ornamental!


Então, basicamente é um rabanete parece uma vagem mas gosto rabanetes que tambem e de grande nutrição, rico em ácido ascórbico, ácido fólico e potássio. Eles são uma boa fonte de vitamina B6 , riboflavina , magnésio , cobre e cálcio.
Então, eu sei que você está perguntando " O que eu faço com  esses Rabanete ? " Eis algumas ideias :

Comê-los crus - eles são ótimos com hummus
Picá-las e colocar em saladas
Purê -los para fazer uma pasta para o sanduiche . 
Adicionar a um Stir Fry asiático com gengibre e alho
Picado -los e adicionar ao couscous , como você faria com cebolhinha
Faça um rápido picles com eles faz um grande lanche!
escolher as flores bonitas e adicioná-los à sua salada. Sim! Elas também são comestíveis
Então, da próxima vez que você está procurando algo diferente para crescer tentar experimentar com rabanetes rabo de rato !


Thursday, September 26, 2013

Sweet Time for Sweet Potatoes


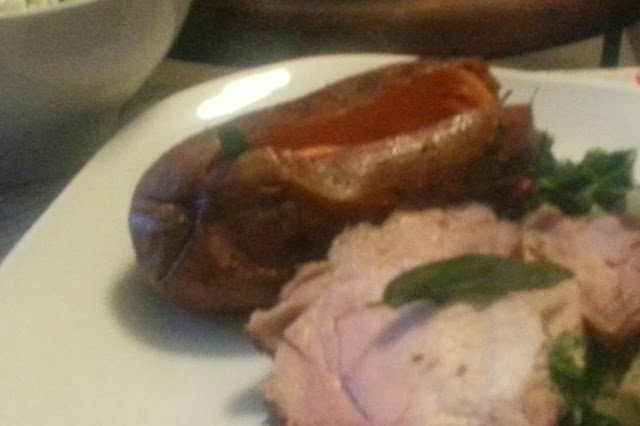
Baked Sweet Potatoes with Maple Chili Butter and Fried Sage
Move over summer and make way for fall — and sweet potatoes, now are in season. Gaining in popularity, the sweet potato is an excellent side dish loaded with vitamin A, vitamin C, potassium, beta-carotene and dietary fiber. In fact, the sweet potato often has been called the “superfood” for its superior, nutritional qualities. One cup or one medium-sized sweet potato, baked in its skin, is about 105 calories and contains no calories from fat.
This side dish goes perfect with the pork loin in the previous post or with  roast chicken as well and it's super easy!!!
 Ingredients
4 Large Sweet Potatoes
1 teaspoon of kosher salt 
1 teaspoon of black pepper
1/2 teaspoon of cumin
12 sage leaves
1/2 cup of vegetable oil
aluminum foil
for the butter
1/2 cup of unsalted butter, softened
1/4 cup maple syrup
1/2 teaspoon of chili flakes
one pinch of salt
Toss the sweet potatoes in olive oil and rub them with salt, pepper and cumin then wrapped them in aluminum foil placed them in a roasting pan and bake them in the oven preheated at 400°F for 35-40 minutes. Meanwhile you can whip your butter in a bowl with the maple syrup, chili flakes and a pinch of salt you can use a whisk and do it by hand or with a mixer. After it's done I like to form the butter into logs using plastics wrap and chill them for a little bit. While you are still waiting for the potatoes to be done you can use that time also to fry your sage. Using a small pot heat up the vegetable oil to a temperature of 350°F fry the sage leaves a little bit of time for a couple minutes until they get crispy, them placed them on paper towel to dry off the extra grease.
Once the potatoes are soft all the way through take them out of the oven cut them open lengthwise place a dollop of the butter in it and garnish each potatoes with 3 sage leaves and then they are ready to be served. Like I said before it goes really well with the pork loin and for a second side dish just some simple spinach or swiss chards sauteed with onions and garlic.
Enjoy
Pri =)


Batata doce com Manteiga deMaple Syrup e Pimenta Calabresa e Folhas de  Salvia Frita 
Passar o verão e abrir-se o caminho para o outono  - e batata doce, esta agora na temporada. Ganhando popularidade , a batata-doce é um excelente prato carregado com vitamina A, vitamina C, fibra de potássio, beta -caroteno e dietética. Na verdade, a batata-doce tem sido muitas vezes chamado de " superalimento" , por suas qualidades nutricionais superiores. Um copo ou uma batata doce de tamanho médio, cozido em sua pele, é de cerca de 105 calorias e não contém calorias provenientes de gordura .
Este prato vai perfeito com o lombo de porco no post anterior ou com frango assado tambem e é super fácil !
 ingredientes
4 batatas grandes doces
1 colher de chá de sal kosher
1 colher de chá de pimenta do reino
1/2 colher de chá de cominho
12 folhas de sálvia
1/2 xícara de óleo vegetal
folha de alumínio

para a manteiga
1/2 xícara de manteiga sem sal, amolecida
1/4 de xícara de maple syrup
1/2 colher de chá pimenta calabresa
uma pitada de sal
Misture as batatas com azeite e esfregue-as com sal, pimenta e cominho , em seguida, enrolar em papel alumínio colocar em uma assadeira e asse no forno pré-aquecido a 205 ° C por 35-40 minutos . Enquanto isso, você pode chicotear seu manteiga em uma tigela com o xarope de bordo , flocos de pimenta e uma pitada de sal que você pode usar uma batedeitra ou misturara mão . Depois de pronto eu gosto de formar a manteiga em cilindros utilizando plástico e colocar na geladeira por alguns minutos para endurecer. Enquanto você ainda está esperando as batatas para ser feito, você pode usar esse tempo também para fritar as folhas de salvia . Usando uma panela pequena aqueça o óleo vegetal a uma temperatura de 175 ° F fritar as folhas deixa por alguns minutos até que fiquem crocantes , e depois colocar em papel toalha para secar o excesso de gordura
Uma vez que as batatas estejam macias por um todo esta na hora de tirá-las do forno, corte-as abrindo as batatas na parte mais longa,coloque uma colherada de manteiga na batata e enfeite cada batata com 3 folhas de sálvia e então estão prontas para serem servidas. Como eu disse antes que isso vai muito bem com o lombo de porco e um simples espinafre ou acelga refogados com cebola e alho completa o prato
Bom apetite

Wednesday, September 25, 2013

Fall Dinner Ideas - Brined Pork Loin

Preparing your pork loin

Brining is one of the most powerful tools you have to make lean meats moister and add flavor to your cooking.
You basically will emerge the loin for about 24 hrs  in water with salt, sugar some spices and herbs. 

Ingredients:

  • 8 cups of water
  • 6 tablespoons kosher salt
  • 4 tablespoons sugar
  • 1/4 cup of peppercorns
  • 3 garlic cloves
  • a quart of an onion
  • couple of sprigs of parsley and thyme
  • 4 -5 sage leaves 
Boil 2 cups of water. Add salt and sugar and stir until dissolved. Add remaining 6 cups of cold water and stir in remaining ingredients. Makes enough brine for about 5 pounds of meat. Brine for at least 24 hours, however you can leave it for several days it you wish.
After 24 hrs remove the meat from the brine let it drain for a few minutes over an rack. I like to tie the pork loin with butcher twine to have a more cook on the loin
Add an herb crust on the pork loin in this one I rubbed the loin in some herb the Provence but that is optional.
Sear the pork all around in a hot pan with a little bit of olive oil,the goal is to get a nice color on the outside of the pork transfer into a roasting pan and place it in oven preheated at 350F  roast for about 30 min or until the internal temperature reaches 140F -145 F pull it out of the oven and let it rest for 5-8 min. Resting the meat like this gives the juices a chance to be reabsorbed into the roast instead of bleeding out if sliced before time. Doing that you pork loin loin will be delicious and  juicy. Note that the meat with have a slight rose color once sliced.
Enjoy
until next post...
Abaixo das fotos esta a tradução para Portugues

A salmoura é uma das ferramentas mais poderosas que você tem para deixar as carnes sucolentas adicionar sabor a sua cozinha.
Você basicamente irá emergir o lombo por cerca de 24 horas em água com sal, açúcar algumas especiarias e ervas.

Ingredientes:

8 copos de água
6 colheres de sopa de sal kosher
4 colheres de sopa de açúcar
1/4 xícara de pimenta
3 dentes de alho
um litro de uma cebola
alguns ramos de salsa e tomilho
4 a 5 folhas de sálvia
Ferva 2 xícaras de água. Adicione o sal eo açúcar e mexa até dissolver. Adicionar restantes 6 xícaras de água fria e misture os ingredientes restantes. Faz salmoura suficiente para cerca de 5 quilos de carne. Salmoura por pelo menos 24 horas, mas você pode deixá-lo por vários dias que você deseja.
Após 24 horas retire a carne da salmoura deixe escorrer por alguns minutos em um rack. Eu gosto de amarrar o lombo de porco com barbante de açougueiro para ter ter o lombo assado mais por igual
Depois eu esfreguei o lombo em algumas ervas da Provença, mas isso é opcional.
Doura carne de porco por todo em uma panela quente com um pouco de azeite de oliva, o objetivo é obter uma boa cor do lado de fora. Tranferir porco em uma assadeira e coloque-o no forno pré-aquecido a 350F(180 Celsius) assado por cerca de 30 min ou até a temperatura interna atinge 140F -145F (60-65 Celsius) retirá-lo do forno e deixe descansar por 5-8 min. Descansando a carne como esta dá os sucos a chance de ser reabsorvido pelo assado em vez de sangrar, se cortado antes do tempo. Fazendo isso você lombo de porco lombo será delicioso e suculento. Note-se que a carne de ter uma ligeira cor de rosa, uma vez cortada.
Enjoy-Bom Apetite e
até o próximo post ...